If Im a Vampire and Become a Werewolf Can I Become a Vampire Again
Skyrim Dawnguard walkthrough – how to consummate the Vampire DLC
A Skyrim Dawnguard walkthrough is necessary, should you want to get the most out of the main mission and fully wrap up all of the side distractions. In giving you the pick to become a Vampire Lord or Vampire Hunter, the Dawnguard DLC is one of the best expansions to Skyrim to date. It's also pretty complex, meaning you might desire to have this Skyrim Dawnguard guide open as you lot attempt to push button through the content.
Of form, the Skyrim Anniversary Edition includes Dawnguard (and all of the other DLC), and this questline is still a lot of fun ten years later. So whether you're stuck looking for a way out of the Dwarven ruins, still trying to observe the terminal Jiubs Opus page in Dawnguard, or but trying to choice upwardly every major item, this Skyrim Dawnguard walkthrough will exist at that place for you every step of the way.
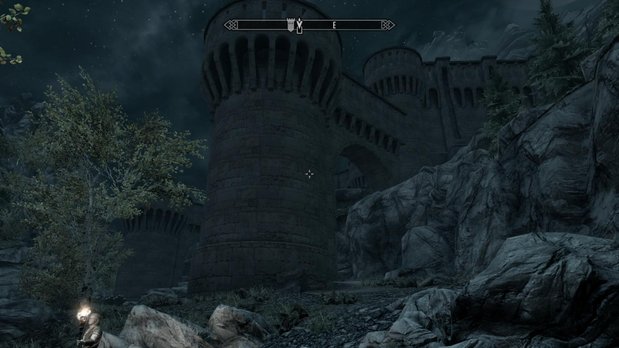
To get started, you're going to want to open up your quest card up and look for "Dawnguard" in the list. Selecting the quest will place a marker in the southwest corner of the map, and following this marker will accept yous to Dayspring Canyon and Fort Dawnguard.
What's New in Dawnguard
What'southward new in Dawnguard
Get a makeover
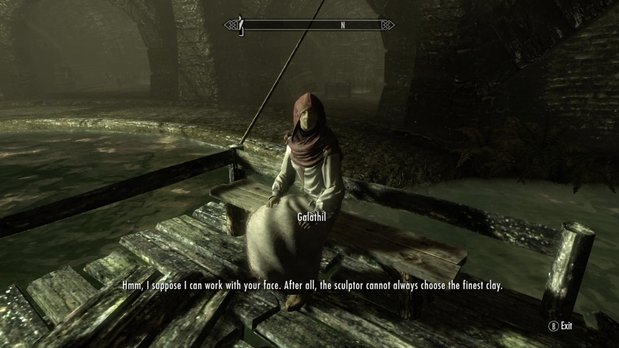
Dawnguard brings with it a new NPC, Galathil, who can alter your confront for a meager sum of 1000g. You tin can find her in The Ragged Flagon, which is a tavern accessed via the Rataway underneath Riften.
Fight a Revered or Legendary Dragon
The Dawnguard DLC offers two new dragon breeds. If you are at least level 60, Revered Dragons volition spawn at random around Skyrim, merely like whatsoever other dragon. Legendary Dragons show up in one case you've hit level lxx. In that location's an achievement/trophy to exist had if yous can bring downwardly one of the latter.
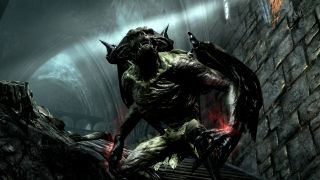
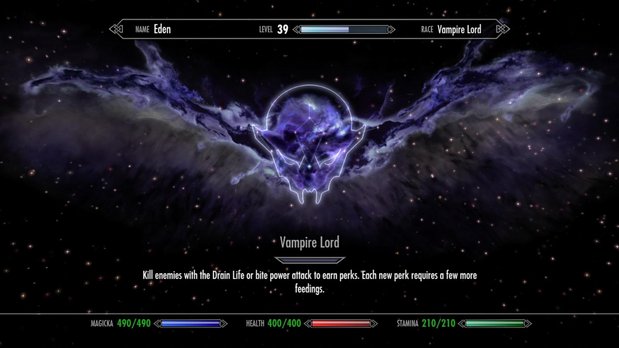
Become a Vampire Lord
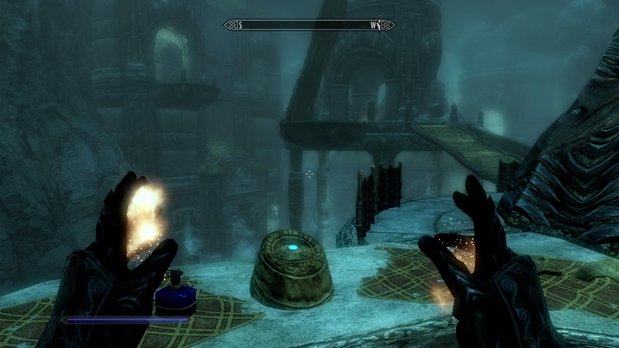
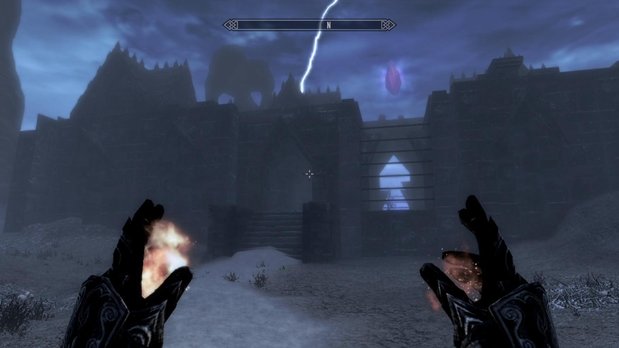
The reward is you tin can use the awesome new Vampire Lord form, consummate with bat teleportation, semi-flight, and its own skill tree. Different a werewolf, you can shift in and out of this class at volition.
The disadvantages are that you're still a vampire, significantly weakened by sunlight and need to feed on people to keep your forcefulness up. Although normal people will non shun you lot, whatever Dawnguard member you run into will assault on sight, fifty-fifty if y'all aren't in Vampire Lord course.
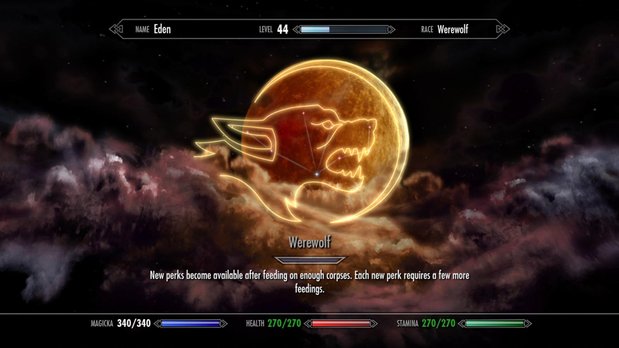
Bolster your werewolf skills
Werewolves now have their own skill trees like to the new Vampire Lords'. This drastically improves the ability of beast course. The skill tree powers are every bit follows:
- Bestial Force: Do 25% more damage (incremental upwardly to 100%)
- Beast Vigor: 100 signal bonus to health and stamina in animate being form
- Gorging: Feeding heals twice as much
- Savage Feeding: Able to feed off most expressionless creatures for one-half the time extension
- Totem of Terror: How of Terror affects even higher level creatures
- Totem of the Predator: Totem of the Hunt howl has extended range, and shows whether the targets are not in combat, searching, or actively in combat
- Totem of Ice Brothers: Howl that calls Ice Wolves
- Totem of the Moon: Totem of Brotherhood howl calls werewolves
Make friends with an armored troll
If you go a member of the Dawnguard, yous tin spend 500 gilt to hire an armored troll to follow yous.
Learn three new shouts
There are some fancy new Dragon Shouts that can be learned. See the side quest section for more than details on where to observe them and what they practice.
Fight a Reaper
No, non one of those flying robots of death. We're referring to the grim variety, and the undercover boss that awaits yous in the Soul Cenotaph. For more details on how to find it and fight it, refer to the side quests section.
Plow your spouse into a vampire
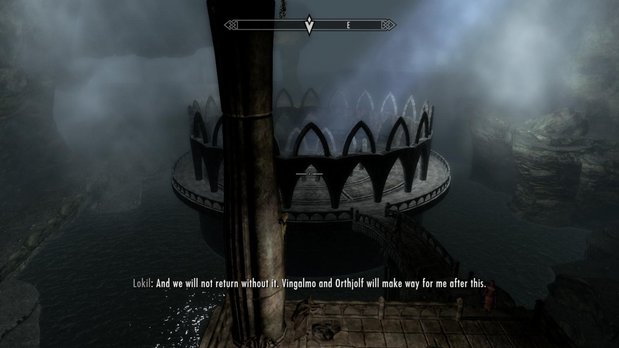
Consummate plenty radiant quests within Castle Volkihar, and Vingalmo volition offer the quest of turning your spouse. All you need to exercise then is use vampire seduction and feed on your beloved.
Vampire Lord or Vampire Hunter?
Vampire Lord or Vampire Hunter in Dawnguard?

Vampire Lord
Choosing to side with the vampires means you have early access to the Vampire Lord form. This class is similar to the Werewolf form, simply with different powers and the ability to revert dorsum to man grade at will. Vampirism itself is such a large topic that we actually put together a whole page on it, ane you lot can find out at our Skyrim vampire choice folio here.
Y'all'll besides have early access to Castle Volkihar, which is full of goodies, shops, and other accommodations from the get-go. Death Hounds can be hired as canis familiaris followers, and you'll proceeds access to spells and vampire-bolstering jewelry that you wouldn't as a fellow member of Dawnguard.
Vampire Hunter
Choosing to side with the Dawnguard gives y'all full access to Fort Dawnguard (which has all the normal amenities of a home base), plus weapons, armor, and spells that are effective against vampires, and the ability to hire Armored Trolls for 500g. These helpers don't count as principal followers, so you keep your primary follower with as well. As a Dawnguard fellow member, you'll also have access to a few new potential human followers and tin hire new husky (dog) followers, which have the properties of a normal dog follower.
Overall, the physical rewards (weapons, etc) are better if you cull Dawnguard. However, yous cannot regularly use the powerful Vampire Lord course until after you've completed the master questline, or else the Dawnguard members will not take you.
Annotation that playing as a Dawnguard member does not hateful you tin never become a Vampire Lord. After the main questline, and later on you've tired of Fort Dawnguard, just ask Serana to plow you lot.
Main Quest Walkthrough
Skyrim Dawnguard Master Quest Walkthrough
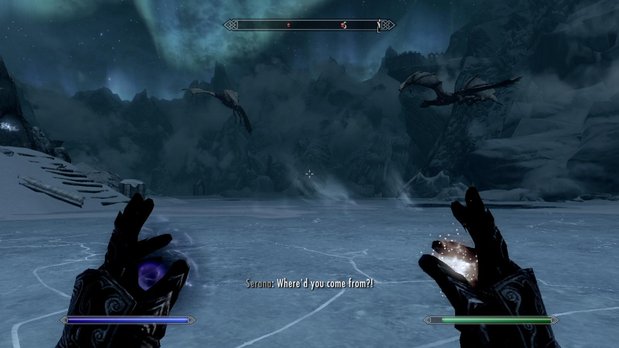
Choosing to either become a vampire or hunt them will grant you a couple of differing quests, only the vast majority of the main questline is the aforementioned no matter which side yous choose, including the showtime, the finish, and your new vampire companion, Serana. As such, we're showing you the path of one who chooses to become a vampire, with short asides in italics for when the quests or choices differ for Dawnguard members.
As well note that there are multiple points during the primary questline where you can go a Vampire Lord, including any time later on you've completed it (just speak to Serana). If yous were previously a werewolf simply chose to convert to vampire, you lot can switch back by speaking to your follower (the i you had prior to Serana).
Dawnguard
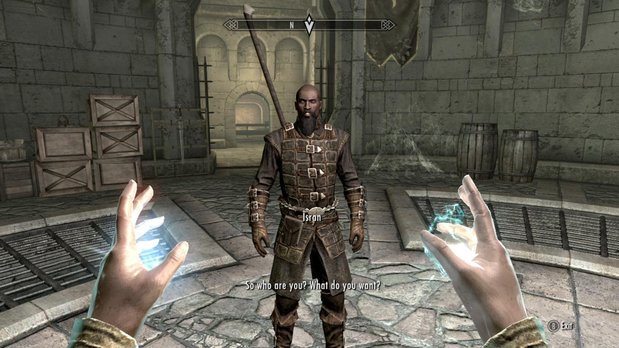
One time within Fort Dawnguard, speak to Isran. Hold to help him chase vampires (once more, don't worry, this doesn't cement your allegiance). He'll give you a crossbow and the side by side quest volition automatically begin. Don't miss that Isran can train in heavy armor.
Enkindling
It's time to visit Dimhollow Catacomb, a dungeon just south of Dawnstar. It will appear on your map, but since information technology is 'undiscovered,' y'all'll have to fast travel to the nearest location and leg it the balance of the way. Since it is halfway up a mountain, we recommend fast traveling to a location such every bit the Lord Stone and heading northward, since it's easier to tactically autumn down a mount that climb up one.
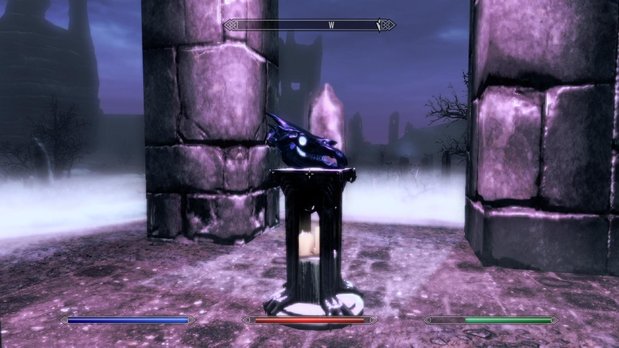
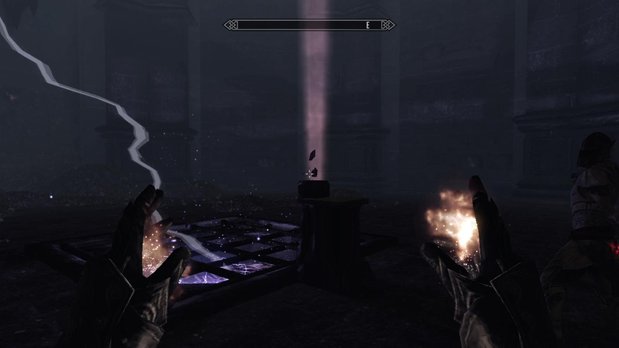
In the first large room of the crypt, clear out the vampires and so arise the brusk tower and look for a chain on the wall. This unlocks the gate and allows you lot to proceed. Work your way through the crypt until yous accomplish the round platform. Press the button at its center to begin a puzzle.
Simply push each Brazier until they are touched by the path of purple flame, which will extend the flame. In that location's no existent thinking involved. Once all the Braziers are lit, activate the monolith that appears and speak to the woman within to complete the quest.
Bloodline
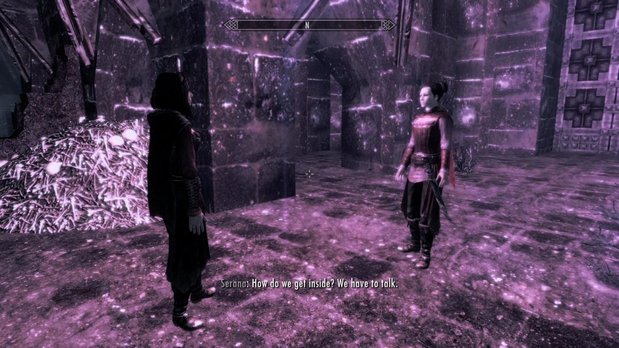
Take Serana and leave the crypt. Don't forget to stop past the discussion wall in the giant stadium-similar room on your way out. The boat leading to Serana's home is in the northwestern about corner of the map. Fast travel to the nearest location and walk the remainder of the manner.
In one case in Castle Volkihar, Harkon will offering yous a pick: his claret, which will turn you into a vampire, or exile, which will drive you to join the Dawnguard.
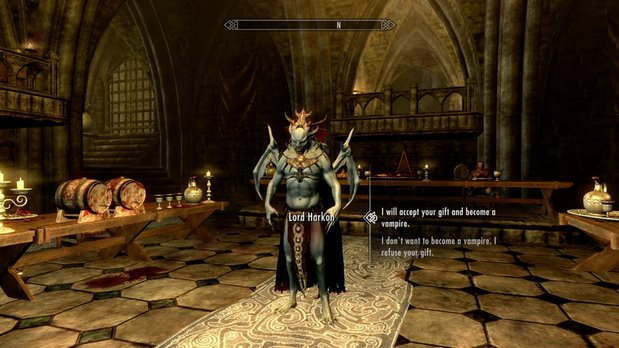
If y'all choose not to become a vampire here and prefer loyalty to the Dawnguard, y'all will be immune to leave, though you can no longer return safely to Castle Volkihar.
Harkon will show you the ropes of existence a Vampire Lord. Follow his instructions to brainstorm your start quest every bit a vampire.
The Bloodstone Chalice (Vampire Simply)
The kickoff chore is to speak to Garen Marethi. If yous're wondering how to change back into homo form, select revert course in the powers carte or y'all can put it into your favorites card, then use that ability.
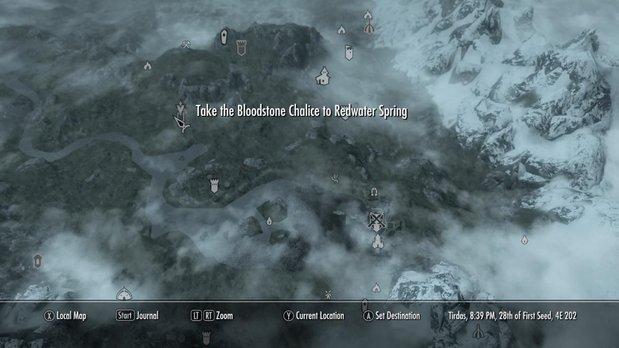
Your next major task is to have a chalice to Redwater Spring. This area is northwest of Riften, and marked on your map when the quest is active.
Once inside Redwater Den, y'all'll discover a locked door (adept) at the back. Pick it yourself or pickpocket the key from the dealer behind the counter. Merely know that once you unlock this door, anybody around you will become hostile. This is perfect time to turn into a Vampire Lord and articulate this identify out.
Yous'll eventually reach what appears to exist a dead end, but if you look, there's a chain right next to a stone wall that volition open up a secret passage.
You'll then enter a new area where you can hear to Vampire'southward chatting about skooma. To open the gate to your left, you'll take to circle all the fashion around via the room beneath, where the enemies are hanging out. When y'all face up them, beware of the big trapdoor in the floor. Falling through means almost sure death by fasten pit.
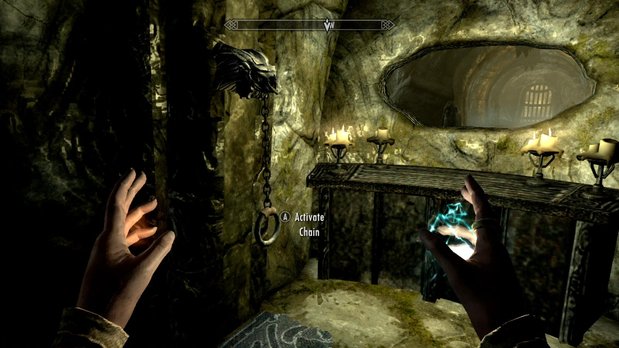
Work your way upward the screw planks and proceed along the path until you achieve the chain, then go along through the gate that was previously shut.
Eventually you'll come upon an enemy named Venarus Vulpin, who's corpse you'll need to loot for the Redwater Wellspring Cardinal. Utilise it to continue through the master-locked iron door (or just pick information technology if you want the exp) and to the spring.
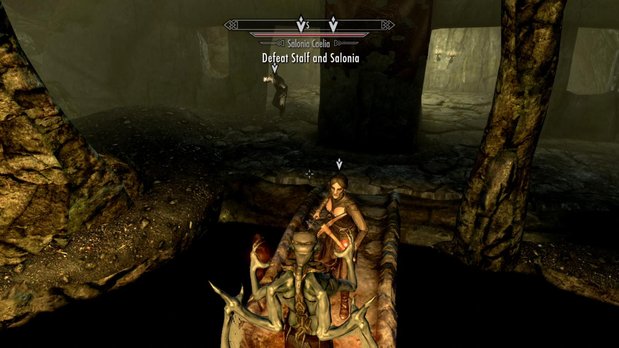
Make full the chalice at the Bloodspring just be prepared to get ambushed by two familiar faces. Once more, switch to Vampire Lord to proceeds the upper hand. Be warned, however, that Stem is a powerful mage and can still end things for you lot quite quickly with his magic. Once the attackers are dead, fill the beaker with their blood as well and then head back to Castle Volkihar to cease the quest.
A New Society (Dawnguard only)
If y'all turn down Harkon and stay loyal to the Dawnguard, this is your next quest. Y'all'll have to defend the fort from a vampire attack, then go out and recruit 2 NPCs for Isran. Once this quest is consummate, y'all volition move on to "Prophet" no thing your allegiance.
Prophet
Speak to Harkon and heed to his speech to begin this quest. Serana volition quickly track you lot down and begin speaking to you. She offers her services as a follower merely doesn't like to exist the third wheel, and so you'll have to ask your current follower to scram if you want Serana's assistance. She is quite powerful and you tin always reunite with your other companion later, so nosotros recommend bringing her along.
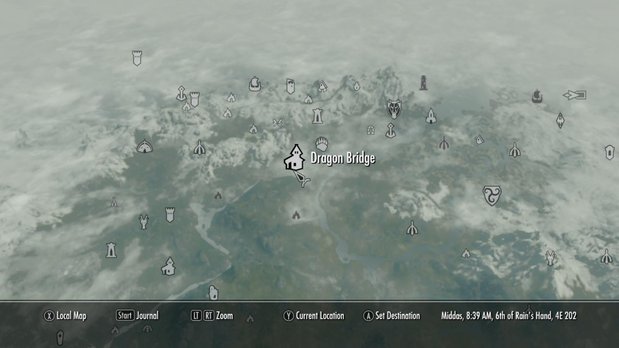
In that location are a lot of optional objectives in this quest which point you toward the Moth Priest, but you can cut through them all if you lot wish by simply heading to Dragon'southward Bridge, found southwest of Solitude. You lot can speak to the kid there or look for an overturned cart just to the south. Bank check the body of the expressionless vampire for a note and read it to detect your next objective.
Forebears' Hideout is only southeast of Dragon Bridge. Brand your manner through the dungeon and follow the cocky-explanatory objectives. When the Moth Priest attacks, defeat him, then use your Vampire Seduction power (nether the 'powers' menu) then feed on him to make him your thrall. Afterward that, speak to him and command him to go to Castle Volkihar.
Return to the castle yourself and command the priest to decipher the Elderberry Gyre. After he does and then, speak to Harkon and your side by side two quests volition kickoff up (Seeking Disclosure and Chasing Echoes).
Chasing Echoes
Speak to Serana to get things started. When she asks where her female parent might be, beingness wrong in your initial choice has no real issue likewise some conversational detours.
Head exterior and effectually to the alternating entrance on the left side of the castle. From here, the quest is straightforward until you achieve the courtyard. You'll accept to discover all of the missing crests and place them in their appropriate spots on the sundial. The 3 missing pieces are in the firsthand vicinity of the courtyard and are easy to spot (they glimmer).
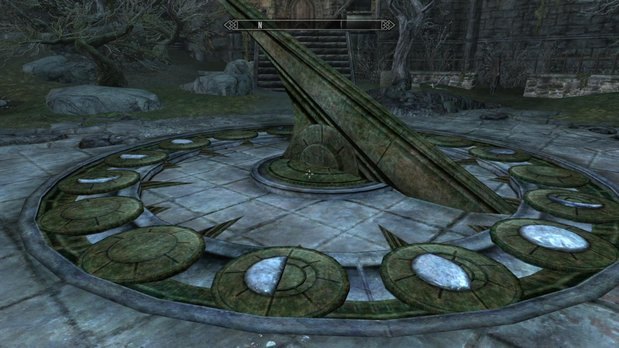
Adding the pieces opens up a secret path leading underneath the courtyard. (If yous're curious near the towers surrounding the courtyard, they are fairly small rooms containing some skeleton enemies and some valuable jewels, ingots, and jewelry.)
Continue on until eventually yous find yourself in a room full of gargoyles. Once y'all've defeated them, Serana will mention something nearly a undercover passage. Become over to the fireplace and turn the unlit candlestick on the left.

Once inside Valerica's Study, talk to Serana. You'll then have to discover her mother'southward journal. The small scarlet volume is on the top shelf of a bookshelf in the southern corner of the room. Testify information technology to Serana, and you lot'll brainstorm a quest to get together some materials. The materials are outlined in your quest notes and are all in the room with you.
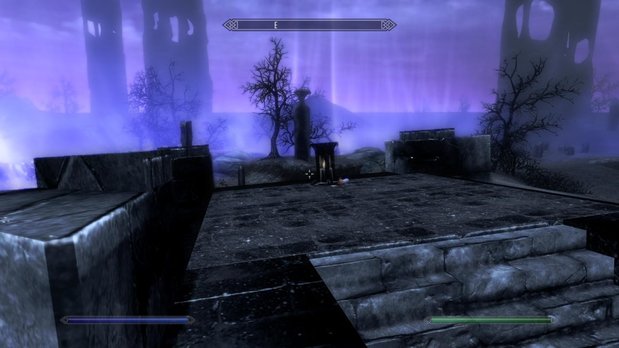
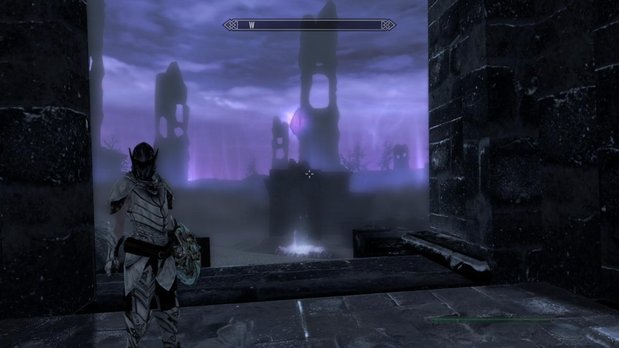
Once you've put the materials in the vessel, the portal to the Soul Cairn volition open.
If you are a Dawnguard member, you'll have to make a choice before entering the Soul Cairn. As Serana volition explain, the area is hungry for life. A normal human cannot survive within. If you lot allow Serana to turn yous into a Vampire Lord, you can enter without beingness harmed. Just make sure to complete the "Rising at Dawn" quest (the standard quest to cure vampirism, started by speaking to Falion in Morthal) before returning to Fort Dawnguard.
The non-vampiric alternative is to allow Serana to perform a partial soul trap ritual on you. This will weaken you inside the Soul Cairn, but you will remain human being and live.
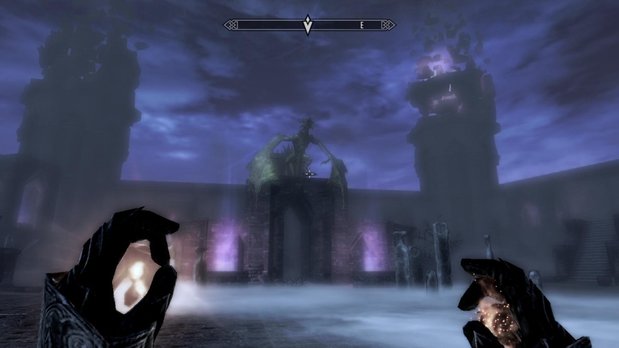
Beyond Death
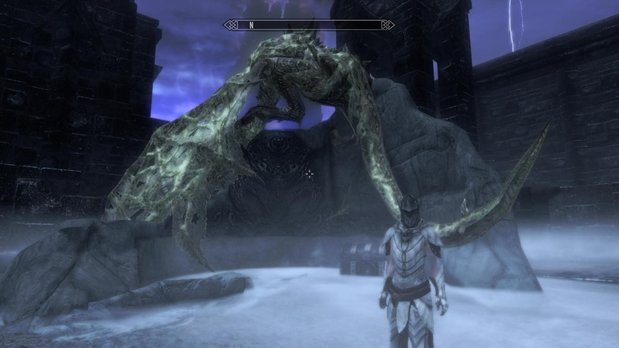
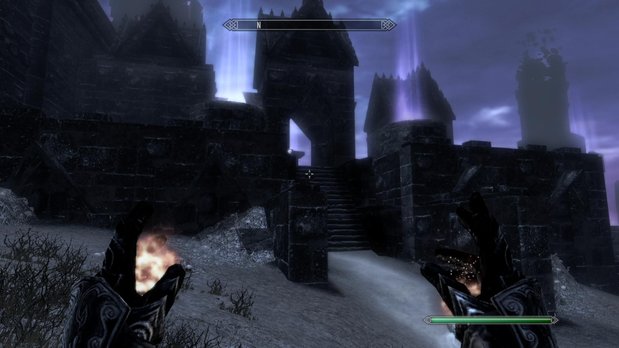
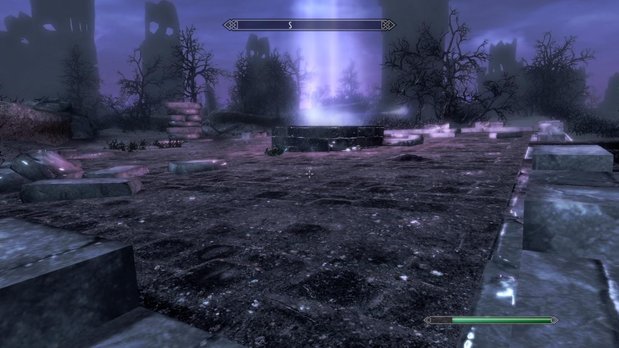
Enter the Soul Cairn and reach the waypoint with Serana in tow and she'll brainstorm talking with her female parent. Your new goal is to kill the three Boneyard Keepers as a means to lower the barrier and gain access to Valerica. All iii Keepers are marked on your map, then simply follow the arrows.
Once you've defeated the keepers, return to Valerica, speak to her, so follow her into the boneyard. Here is where you'll have to take on Durnehviir the dragon. It's not a particularly difficult fight, simply the bonemen that spawn tin complicate things. Valerica and Serana will handle about of the bonemen, just because of the sheer number that spawn, you'll withal have a scattering on your tail as you lot try and deal with Durnehviir.
Afterward the battle, grab the curl and speak to Valerica. Information technology is at present time to leave this place, simply if you want to take on some of the side quests before you do (though you tin can always return to the Soul Cairn), move onto the side quest section.
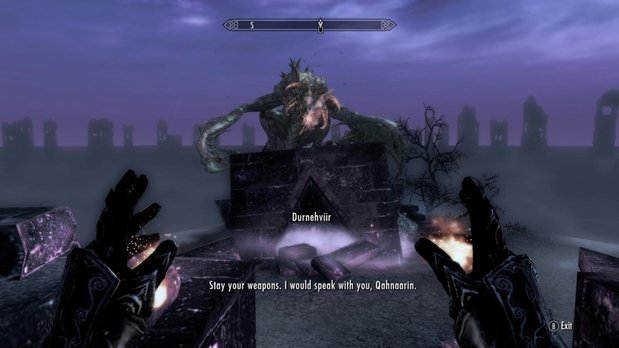
As you get out the boneyard, Durnehviir will teach you the "Curse, Summon Durnehviir" shout, which summons Durnehviir into battle to assistance you.
The Dragon Elder Curlicue
The second scroll you need is the Dragon Elderberry Scroll. If you have already completed the quest "Discerning the Transmundane" from the vanilla Skyrim quest bank, you lot will already have the Elderberry Roll in your possession. If you happened to sell information technology to Urag gro-Shub, go to the College and purchase it back.
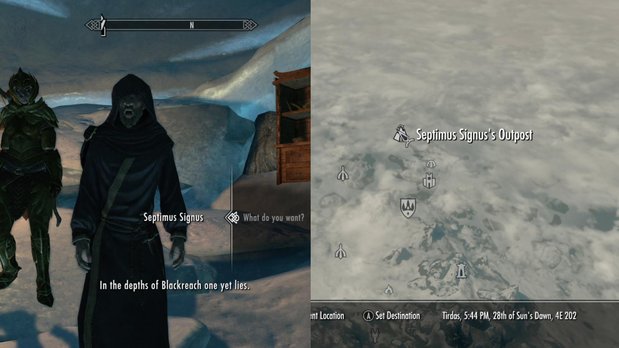
To begin "Discerning the Transmundane," seek out Septimus Signus in his outpost north of the College of Winterhold (pictured above). The quest is lengthy, but at the end, the scroll will exist yours.
Seeking Disclosure
At present that you take both scrolls, you can complete this quest. Render to Volkihar and speak to Dexion. He'll give you your next quest.
Unseen Visions
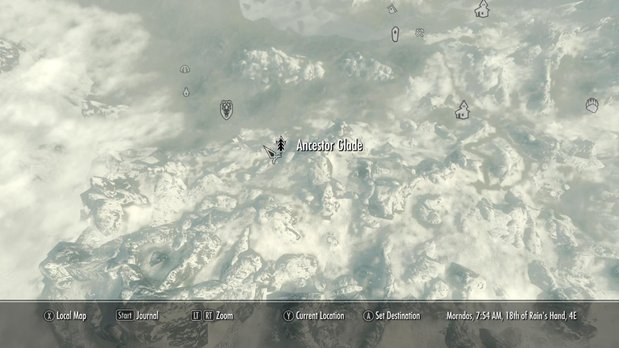
You'll have to travel all the way to Antecedent Glade, which is southeast of Falkreath. Once inside, grab the knife, then get together bark from one of the surrounding trees. Once you take information technology, run around the area looking for moth swarms. In one case you've gathered vii, stand in the lite, select the Blood Elder Scroll, and read information technology.
Touching the Sky
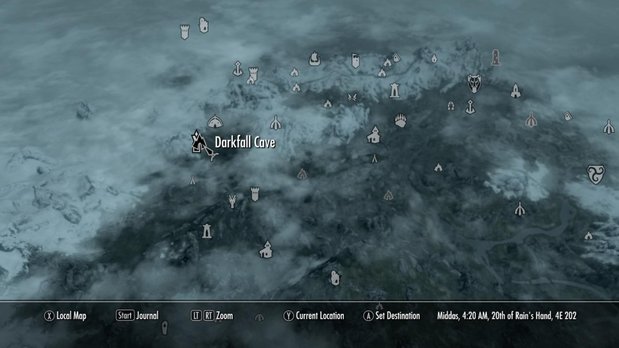
Your next destination is Darkfall Cave, just south of Mor Khazgur. Motion through information technology until you find Gelebor, who will give you a complicated task before helping you lot get Auriel's Bow. Go along forward through the portal into the Darkfall Passage.
You'll have to move through the passage until you striking a wayshrine. Depict water from the bowl and laissez passer through the portal backside information technology to arrive in the Forgotten Vale. Here is where y'all'll find three more basins (marked on your map) to describe water from.

The final bowl is in the Glacial Scissure. To reach this area, caput towards the marking on your map. (You'll find that it indicates the final basin is in an area beyond the Forgotten Vale.) Work your way upriver to reach it.
Pass through the Glacial Crevice and y'all'll sally onto the Forgotten Gale - this time closer to the last wayshrine. Make your fashion through the Falmer village. One time yous've reached the final wayshrine and filled your basin, turn effectually and enter the giant temple in the distance.
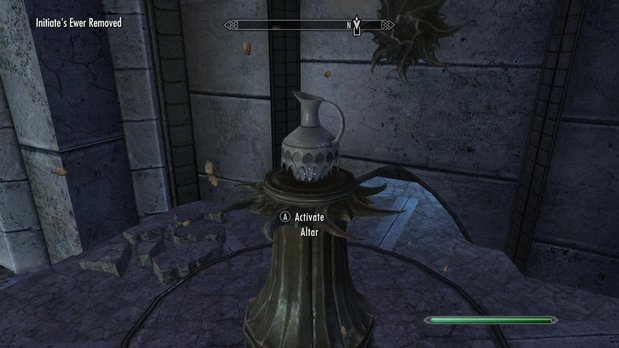
Pour your water into the basin near the main entrance to gain access to the temple. Once inside, you'll come up across several doors that require y'all to identify your ewer on a nearby chantry to open the path. Once you practise and so, pick up the ewer (so that you can use it again) and brand mode through the doorway earlier it closes. There is ever another altar on the other side, so don't worry about becoming trapped.

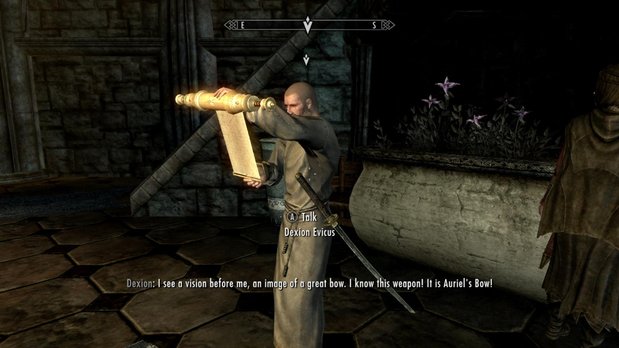
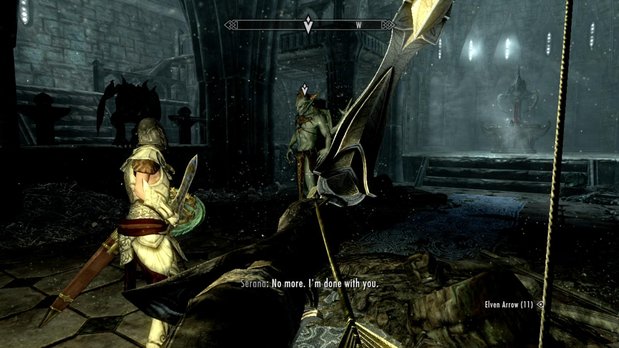
Proceed until you reach Vyrthur. Subsequently speaking with him, all of the frozen beings in the room will reanimate and assail you. Defeat all enemies, then follow Serana up to the balcony. Here yous'll have to face and defeat Vyrthur. Finally, yous will be immune to take Auriel'due south Bow and complete this quest.
Kindred Judgement
Speak to Serana. Instead of taking the portal back to Darkfall Cavern, merely fast travel out of the surface area (yous are outside at this point) and to Castle Volkihar. Once inside, enter the cathedral and speak to Harkon. You lot can wait for the lengthy dialog, or just attack - either way, a battle volition ensue.
Harkon is a hard target because he will slowly regenerate his health throughout battle and uses his bat form to teleport effectually the room. If you have some means of stunning him (such as high-level dualcasting), by all means use information technology.
He'll also summon skeletons and gargoyles to fight alongside him. You may want to avoid spending time dealing with these and instead chase Harkon around the room. The longer yous are distracted, the more he will heal.
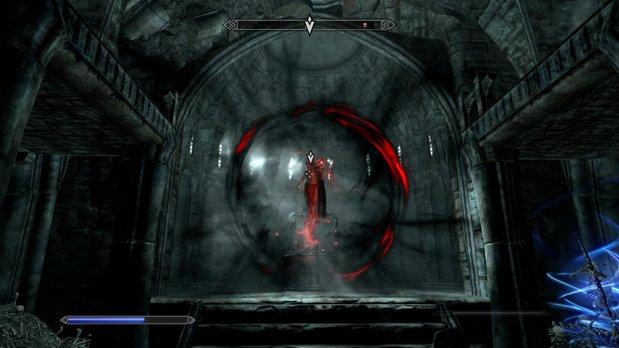
Once he takes a certain amount of harm, he volition return to the heart of the room and environs himself in a crimson healing aura. At this betoken, whip out the Auriel Bow and fire it as rapidly every bit you can so as to stop his regeneration.
Notable loot from Harkon's corpse includes Vampire Royal Armor, which is corking for mages as it not only offers the 'magicka regenerates 125% faster' perk, only it provides defense force, unlike robes. You'll also get Harkon's katana, which, while fairly weak, absorbs 15 points of health, magicka, and stamina if wielded by a vampire. Serana can besides get a permanent follower at this point if you wish. She hangs out at the castle otherwise.
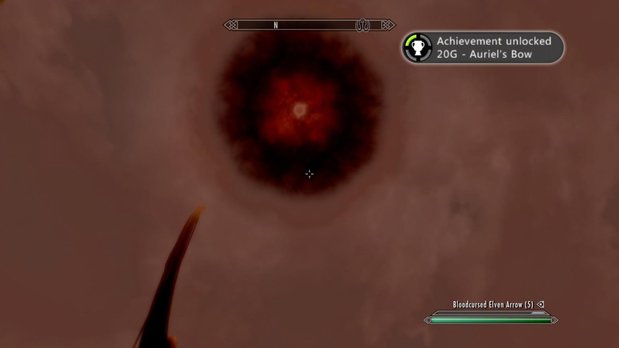
If you are a Vampire Lord and have some elven arrows, yous can now ask Serana to coat them with her blood. If you apply Auriel's Bow to shoot these arrows at the sun, you can plough it red, nullifying the negative effects it has on you lot equally a vampire (for the rest of that twenty-four hour period simply).
Lost to the Ages Quest
Dawnguard Lost to the Ages Quest
Katrina has dedicated her life to finding the Aetherium Forge. Unfortunately, she died in an convulsion while in the Dwemer surreptitious before she could complete her quest. Now the task falls to you, Dovahkiin. Can yous find all the Aetherium shards and survive the perilous Dwemer ruins filled with traps and aboriginal metal guardians? Well, if you lot need any help we've made a guide to get y'all through this massive side quest.
Upon completion, this side quest grants you lot the Lost to the Ages trophy or achievement and a very spiffy item. Skip to the end of this picayune walkthrough to see what'south up for grabs.
Shard 1
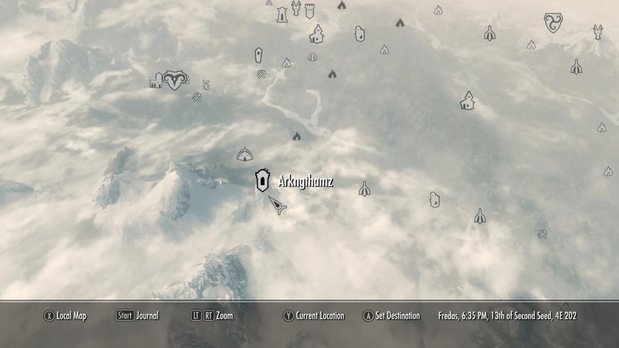
To begin this lengthy quest, you can read about it in a book called "The Aetherium Wars" (found in various locations) or simply travel to Arkngthamz. This location is marked on your map automatically once the Dawnguard DLC is installed. It is southeast of Markarth.
Enter Arkngthamz and brand your way through it until the ghost of Katria appears and speaks to you. You can have her accompany you to the pinnacle. Make sure to grab her periodical from her corpse nearby.
When you accomplish the Tonal Lock puzzle, strike the locks in the following gild: lower left, lower right, upper left, upper right, center. Once inside, grab the Aetherium Shard.
Shard two
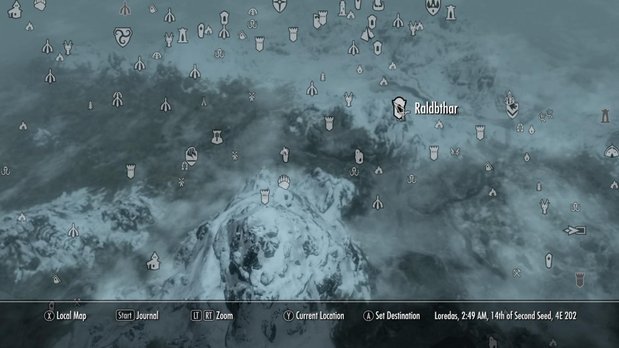
Your next destination is Raldbthar, a mountaintop ruin west of Windhelm. Make your style through this trap-laden place.
When you get to a raised span, look for a push to the due north (pictured higher up).
When yous become to the ready of iv buttons, press the 2d from the correct to lower the bars to the left.

When y'all reach the room with the seized gears, inspect each of the gears in the room for obstructions. In that location are four obstructions that need to exist removed (one of which is in the gear underwater). Once you lot remove them, press the button to lower a bridge. Defeat the Centurion and proceed through the door behind the spot from which he attacked from.
Continue on and grab the 2d shard. Use the lift in the room nearby to exit the ruins quickly.
Shard three
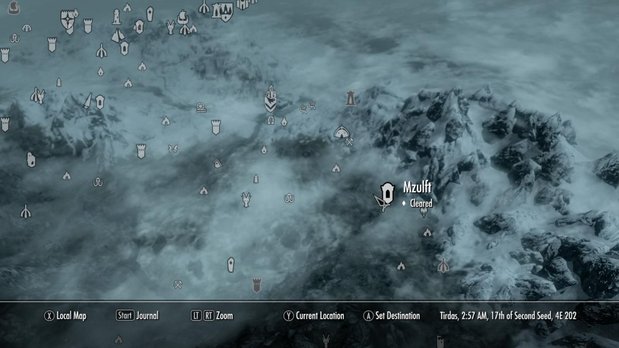
Travel to Mzulft, a ruin southeast of Windhelm. The third shard is non in the ruin itself, merely in the Dwarven Storeroom nearby. Within the storeroom, unlock the gate and claim the shard.
Shard iv
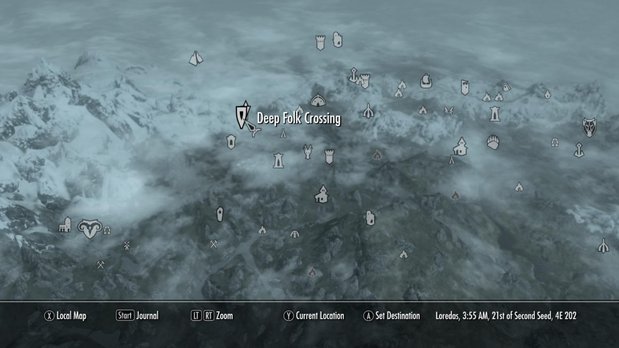
Your side by side destination is Deep Folk Crossing, which is northeast of Markarth and southwest of Mor Khazgur.
Finding the forge
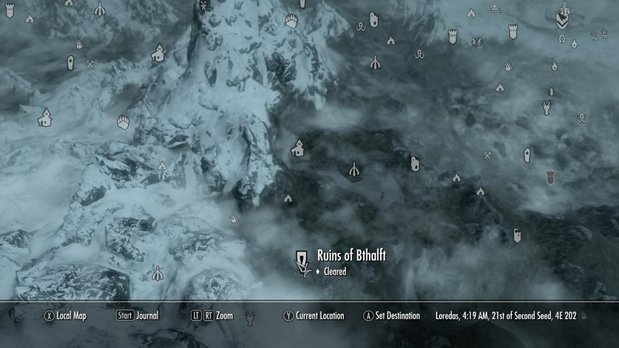
Travel to the Ruins of Bthalft, which are direct south of Ivarstead and far northwest of Riften. Once in that location, speak to Katria, who will be waiting for you. Put the shards into the Dwemer Mechanism, then once the crest is assembled, have information technology out and stand articulate. The platform will rise, creating a new entranceway. Employ it to descend into the forge.
You'll eventually attain the locked door pictured in a higher place. Shoot both resonators to open up the path. When you achieve the actual forge, shut off the steam past closing the nearby valves. Once you exercise, a bunch of dwarven machines volition attack.
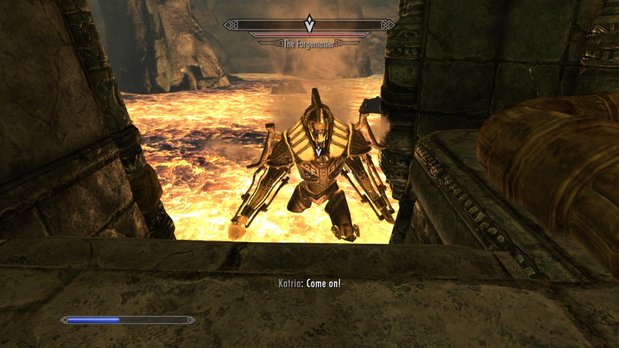
After yous defeat all of the normal machines, the Forgemaster boss volition appear. After having been swarmed past and so many enemies at once, defeating this one monstrous foe should be an easy task for y'all. Simply exist aware that the Forgemaster resists burn down attacks.
Using the forge
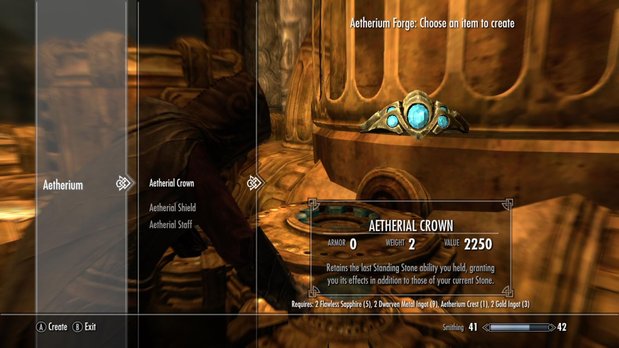
You are able to arts and crafts merely one of iii items in the Aetherium Forge. As well the Crest, which y'all already have, all required materials can be found in a breast to the right. A quest marker shows y'all where. Possible creations are as follows:
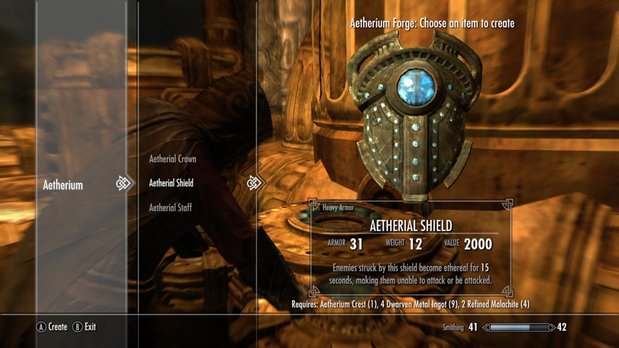
Above: Enemies struck past shield become ethereal for 15 seconds (invincible only unable to attack)
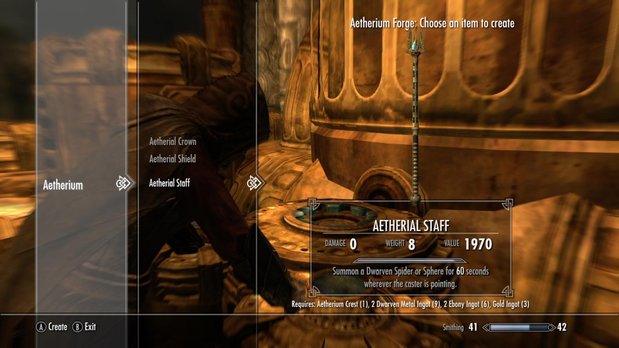
Above: Summon a Dwarven Spider or Sphere for lx seconds
Crafting an item will finish the quest and earn you the Lost to the Ages trophy or achievement.
Impatience of a Saint Quest
Dawnguard Impatience of a Saint Quest
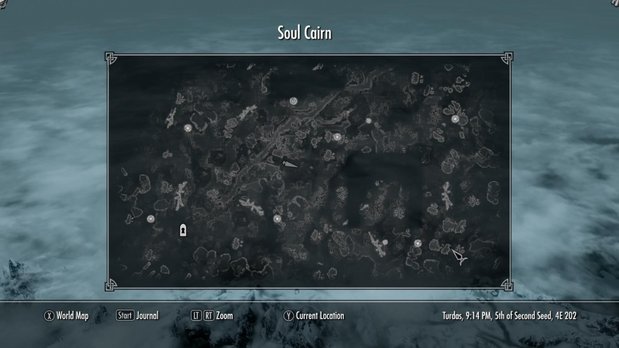
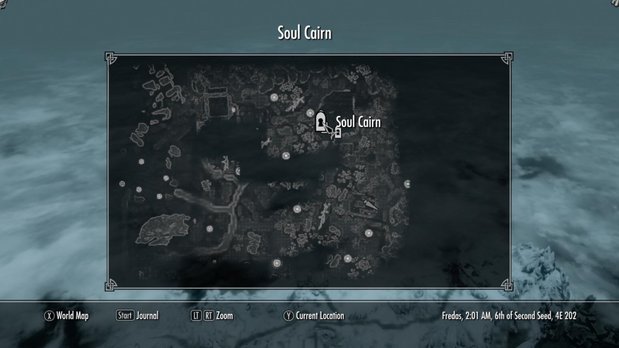
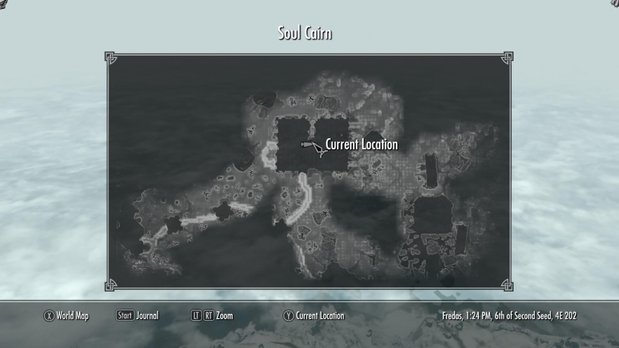
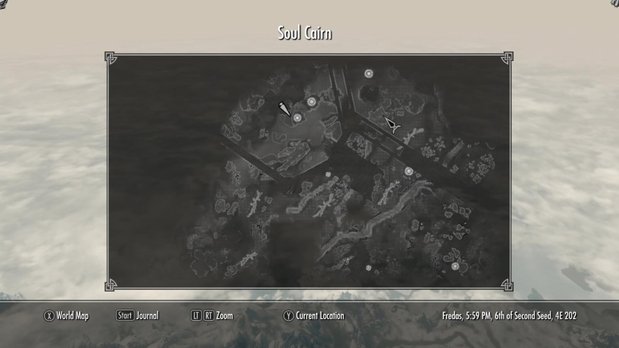
Perhaps the well-nigh hard quest of the entire DLC, Impatience of a Saint requires y'all track down 10 pages of Jiubs memoirs, which are scattered all across the massive Soul Cairn (an surface area you gain access to at the cease of the "Chasing Echoes" main quest).
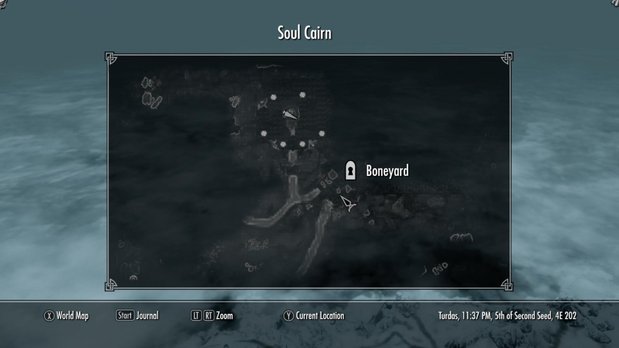
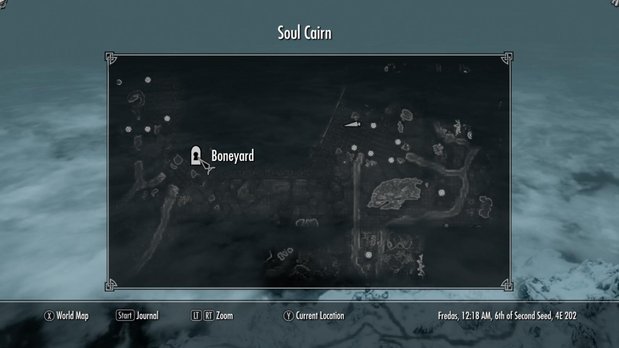
The Soul Cairn is a big place, so in order to help you utilise our guide, you'll demand to sympathise the layout of the area. You enter the Soul Cairn from its southwest corner. At that place is a adequately direct main path that leads all the fashion through the area and to the Boneyard (a massive structure) in the northeast end atop a hill, where Valerica stays. A niggling less than halfway along that path, y'all'll pass through a gap in a large wall that runs in a southeastern direction and divides the entire Soul Cenotaph into two sections.
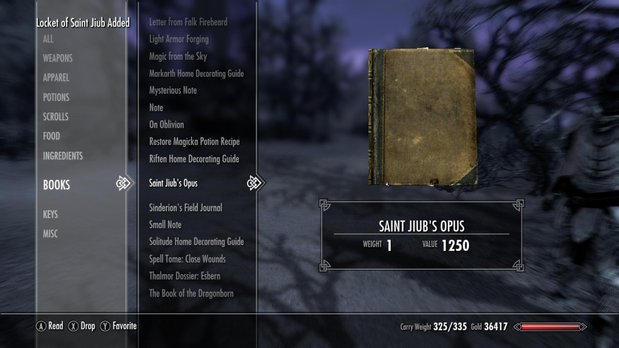
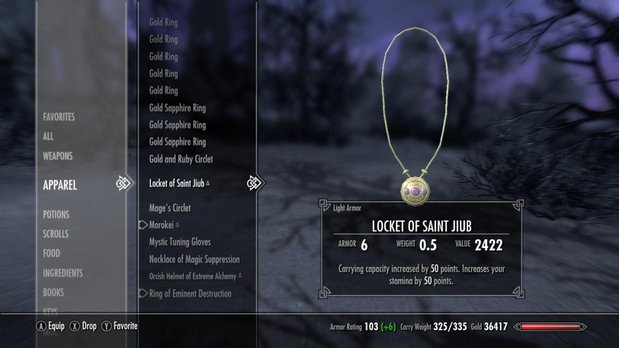
Your rewards for this quest are two items (unfortunately no trophy or achievement): Saint Jiub'south Opus, which is but all x pages mashed together into a relatively worthless book, and the Locket of Saint Jib, which increases both your carrying chapters and stamina past fifty. Both are pictured below:
Where is Jiub?
Jiub is far beyond the wall that divides the Soul Cairn. If y'all were to start from the steps leading into the Boneyard, head south-southeast. He's amidst some expressionless trees just due east of the large structure with the windowed walls and one of the hovering, soul-draining crystals. If you've plant the Reaper'south Lair, he's northwest of that.
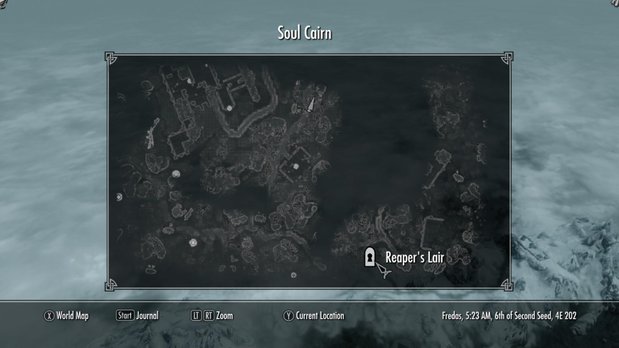
An alternative way to detect him is to start at the gap in the wall and continue along the main path until you accomplish the short, raised platform that serves as a hub to four different path branches. From this hub, head straight eastward, not following any path. You lot'll eventually (and literally) run into the structure mentioned in the above paragraph. Simply go around it and continue directly e - Jiub is not far from that structure.
Page 1
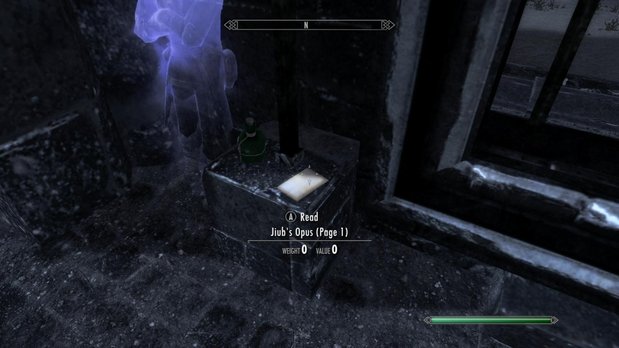

From the south side of the wall, caput for the gap. Instead of passing through it, follow along the wall to the southeast until y'all attain a short staircase leading to an alcove with a soul. The page is right side by side to him.
Folio 8
Every bit yous move towards the wall from the archway to the Soul Cairn, you should spot a small edifice with stairs leading up to its barred entrance, which is locked by the two blue orbs on either side of it. Blast the orbs with magic or arrows to open the bars and discover a page inside.
Page 6
From folio 8, move further along the main path leading to the wall from the south side and you'll notice a pocket-sized but open structure on the correct with four support columns. Inside at that place's a chest; the page is on the flooring next to it.
Page ten
Just after passing through the gap in the wall, look for a merchant soul continuing next to a cart, which is in forepart of a large structure. Bank check on top of the barrel next to his cart for a page.
Page 2
Descend the Boneyard Entrance's stairs and make an immediate right. Enter the building you meet to find a give-and-take wall (Durnehviir hangs out here afterwards y'all've made friends with him). The page is on the basis near the breast next to the word wall.
Page 4
Descend the Boneyard Entrance's stairs and turn left. Follow the wall until yous reach another role of the structure with stairs leading upwards. Climb these stairs and y'all'll find a handful of souls lingering effectually. Look for some other short staircase leading up. At the elevation, you lot'll find a brusque corridor with a breast at the finish. The page is on the footing near the chest.
Folio 7
Head s-southeast from the 4 Soul Cenotaph teleporters marked on the map (which are far due east of the Boneyard). You should spot a raised platform planted in the middle of the footing. Climb the steps and bank check the floor under the altar, which holds the "Conjure Mistman" spell tome.
Page 5
From where you discover Jiub, head directly south. Expect for a big soul well with a wish circling around information technology. The annotation is at the base of this well next to some other goodies.
Folio 9
Descend the Boneyard Entrance's stairs and get-go heading west. As you go, you'll find a building with soul-absorbing crystal above it. Continue by that building to an even larger edifice - also with a crystal above it. This building is really a huge maze. Work your fashion through it until you find the teleporter that leads to the roof. Upward hither you'll find the page adjacent to the breast that lies directly under the floating crystal.
Folio three
From the entrance to the Soul Cenotaph, go up to the gap in the large wall. Stay on the s side of the wall and follow information technology due west until you can pass through a small-scale entranceway into an enclosed area with a building featuring a floating crystal higher up it. The page is on the basis near the chest found directly under that crystal.
Other Notable Side Quests
Other Notable Side Quests
Although there are other side quests and plenty of radiant miscellaneous quests (a handful for both the Dawnguard and Vampires, found in their respective lairs), we're outlining the ones that offer the most tangible and valuable rewards - or are simply plain interesting.
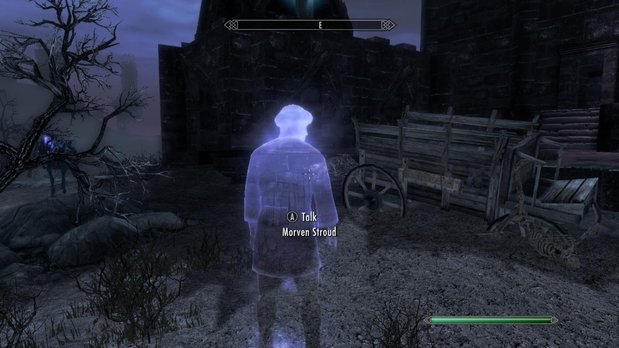
Notice Arvak's Caput and gain a spectral steed
You lot main run into Avark's owner (he's a soul) on the main path leading through the Soul Cairn. He'll requite you the quest to observe Avark's head. You don't need to take the quest first to find the head, nonetheless.
Avark's head is on an altar just southwest of the massive floating belfry atop which you lot find the archer Boneyard Keeper during the master questline. In one case you have the skull, you can select the misc quest and look at where you need to go on the map. Render the skull to this location, and Avark will become yours. You can summon him at any time using the agreeableness spell yous now have.
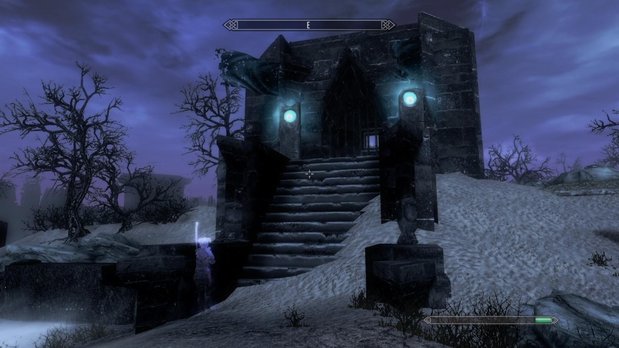
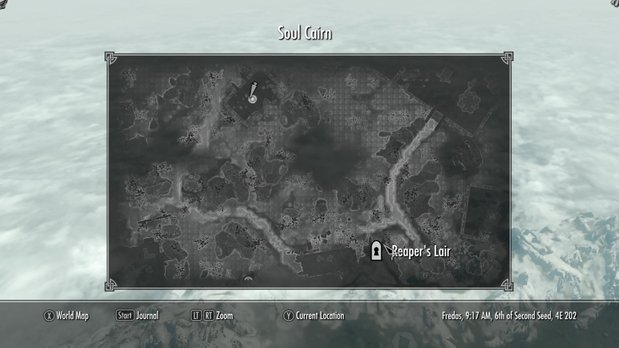
Fight the Reaper
The Reaper is a (sort of) hidden boss that resides in the "Reaper'southward Lair" in southeastern corner of the northward one-half of the Soul Cairn. You'll demand to collect iii Reaper Shards and place them in the receptacle in the heart of the lair for the boss to appear. Reaper Shards can be establish in the chests directly underneath the soul-sapping crystals all around the Soul Cairn.
Be warned that at the time of publication, this quest can be glitched. Fifty-fifty if yous have the required number of shards, the game may not register this if yous do not identify them in the receptacle all at once.
Defeating the Reaper gets you three empty Blackness Soul Gems, one Daedra Centre, and one dual-handed Iron weapon (non enchanted). Not exactly enticing, peculiarly considering the legwork that goes into finding the Reaper Shards.
Morven Stroud'southward Shop
Simply across the wall at the center of the Soul Cairn, to right, you'll find Morven. For 25 Soul Husks (which can be constitute all around the Soul Cairn), you lot can become your choice of a sword, a battleaxe, light armor, heavy armor, or a spell tome. None are particularly special. They are random and match your electric current level in terms of value and enchantments. If yous find enough husks you can completely buy him out; only know that he only has 1 of each particular.
Acquire the Drain Vitality Shout
Though you may already know a shout by this proper name, the i in the Dawnguard DLC is a separate shout and has a unlike effect. You lot'll have to find each word the old-fashioned way.
Stamina: You lot'll observe this shout in the stadium-like room of Dimhollow Cavern. Nab it while you are escorting Serana out during the "Bloodline" quest.
Magicka: While traversing the Forgotten Vale (part of the main questline of Dawnguard), you'll demand to search out a duo of dragons that announced from beneath a large frozen lake. The give-and-take wall sticks out similar a sore thumb; the challenge is taking on these two named dragons simultaneously.
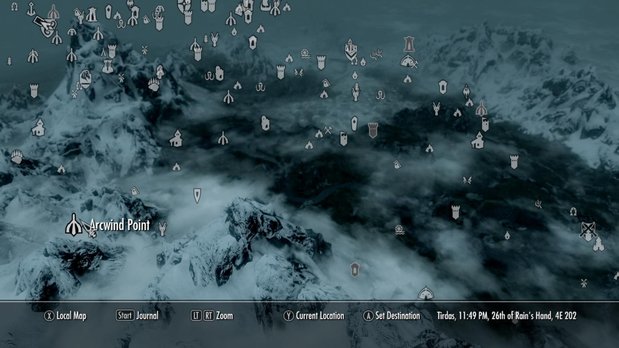
Health: This discussion wall tin can be found at Arcwind Signal (pictured), far west of Riften. To reach it, look for a path just east of the dragon's lair Autonmnwatch Tower leading up the mount. Although Arcwind Point was accessible earlier the Dawnguard DLC, there was no discussion wall nowadays.
Learn the Summon Durnehviir shout
After defeating Durnehviir at the Boneyard in the Soul Cairn as part of the master questline, the dragon will exist waiting for y'all at the exit. He'll teach you lot this shout, which can be used to summon him. He asks you to caput dorsum to Tamriel and use this shout to summon him.
The first three times you summon him, he'll teach yous one word of a new shout. After he teaches you lot that shout, he'll contribute to boxing whenever y'all summon him.
Learn the Soul Tear shout
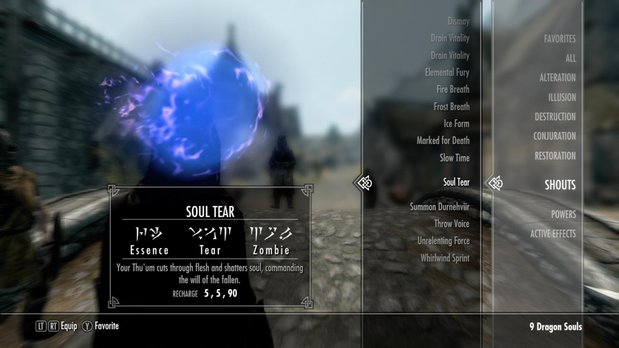
One time you have the ability to summon Durnehviir, do and then in Tamriel 3 times and he'll teach you this shout. Using the shout raises the dead and fills a soul gem.
Skyrim cheats | Best Skyrim mods | How to install Skyrim mods | Best Skyrim companions | Skyrim armor | Skyrim perks | Skyrim enchanting guide | Skyrim abracadabra guide | Skyrim hidden chest locations | Skyrim hidden quest locations | Skyrim Black Books guide | Skyrim Daedric Quest guide
Source: https://www.gamesradar.com/dawnguard-walkthrough/
0 Response to "If Im a Vampire and Become a Werewolf Can I Become a Vampire Again"
Postar um comentário